¡No podemos parar! En estas fechas en las que casi todos nos relajamos, a nosotras nos apetecía mucho hacer costura. Hemos confeccionado una camisa para una niña de 4 años.
We cannot stop! At this time when everyone is relaxing, we fancy sewing. We have made a shirt for a 4-year-old girl.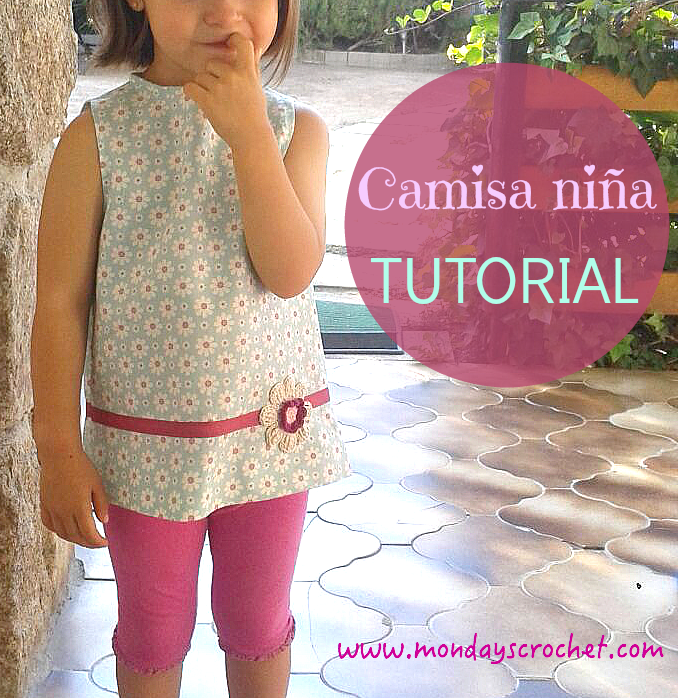
TUTORIAL PARA UNA CAMISA DE NIÑA. CONTORNO DE PECHO 60 cm / GIRL SHIRT TUTORIAL. CHEST CONTOUR 60 CM
GRADO DE DIFICULTAD
Medio
MATERIALES PARA LA CAMISA
50 x 110 cm de tela de algodón estampada
1 m de cinta gros-grain de 13 mm
Cremallera invisible de 20 cm
Automático pequeño
Hilo para coser la tela
Hilo para coser la cinta
DIFFICULTY
Medium
MATERIALS
50 x 110 cm de printed cotton fabric
1 m de ribbon of 13 mm
Invisible zipper of 20 cm
Small stud
Thread to sew the fabric
Thread to sew the ribbon
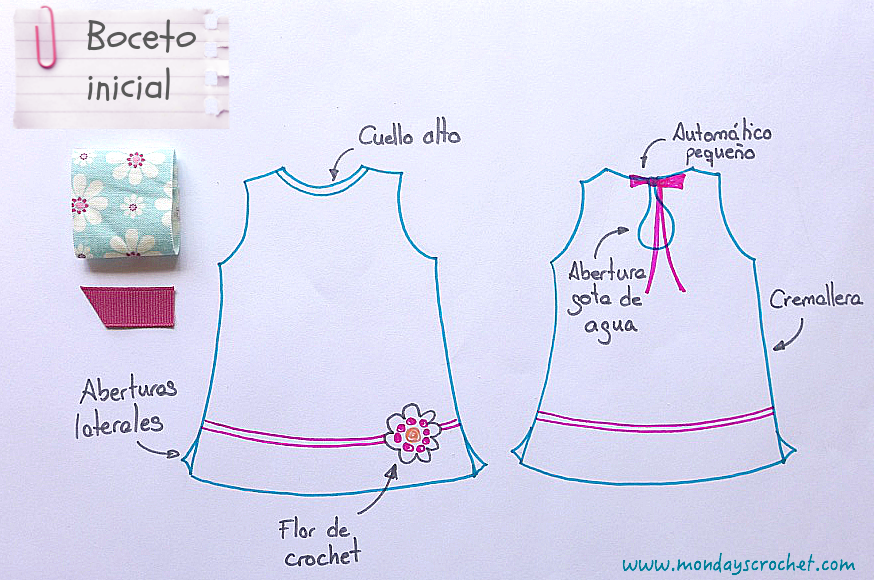
Toda idea empieza por un boceto y nosotras teníamos muy claras las líneas de esta camisa.
Every idea starts with a sketch and we have a very clear idea of the design of this shirt.
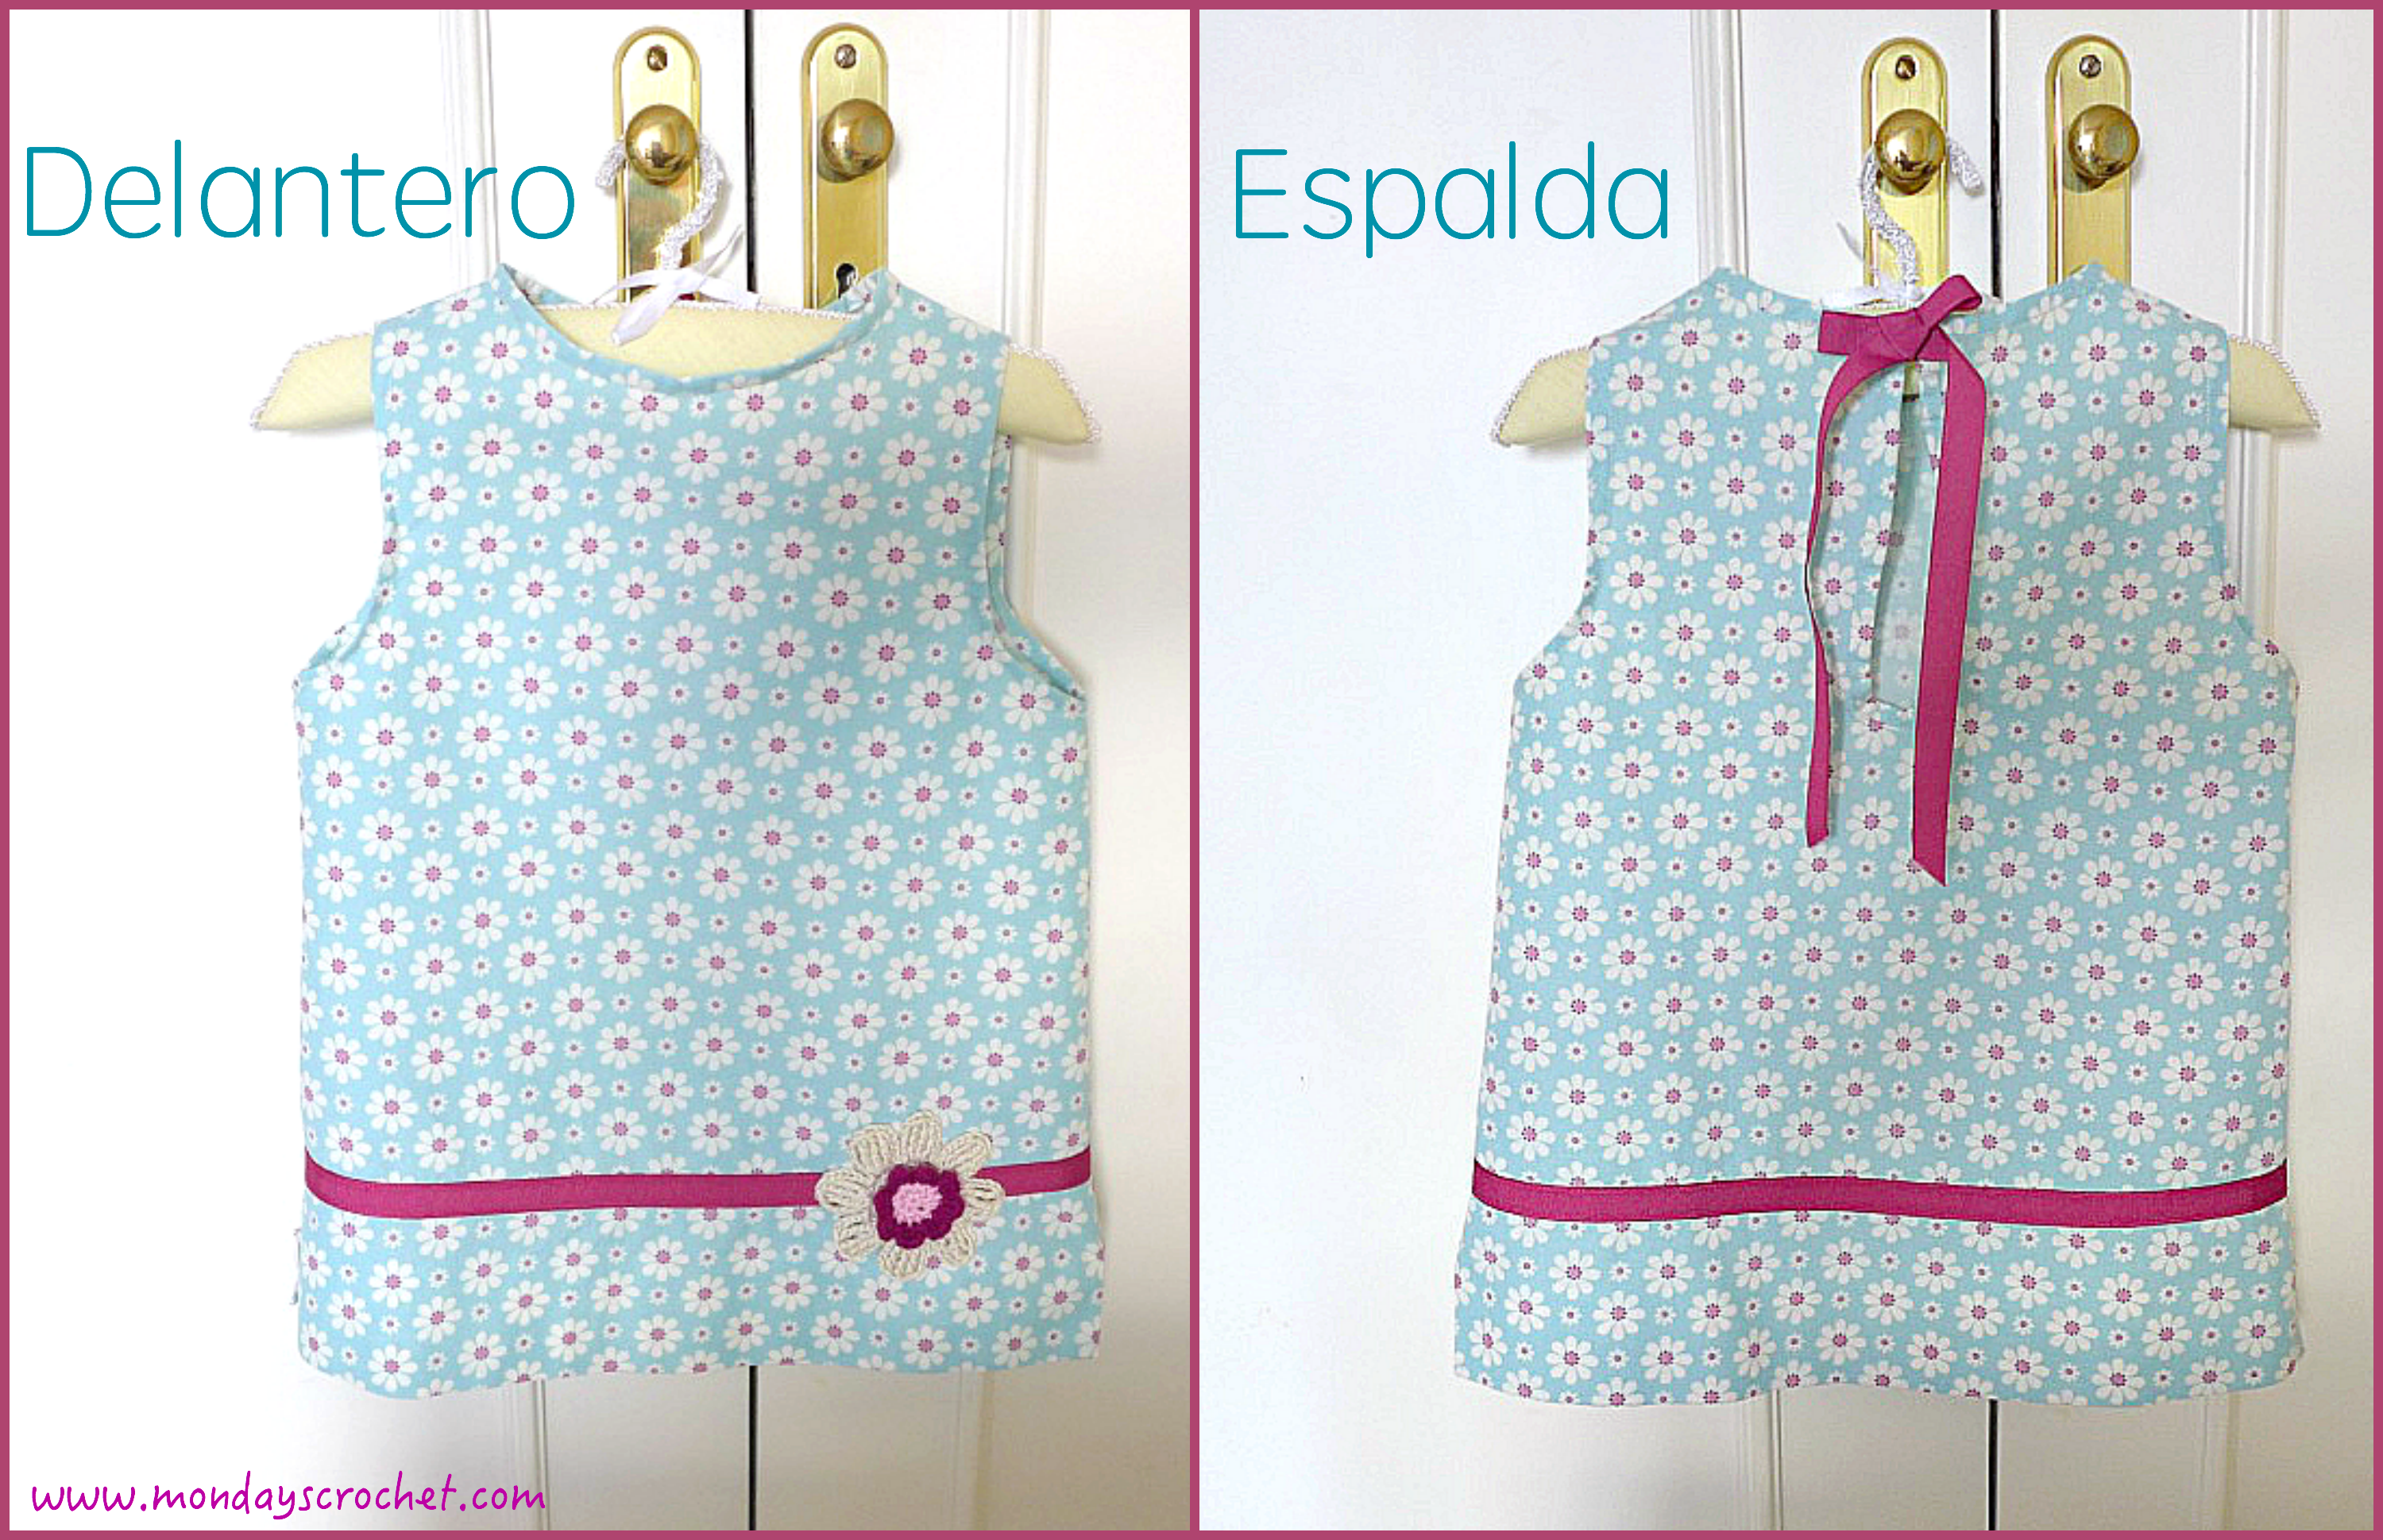
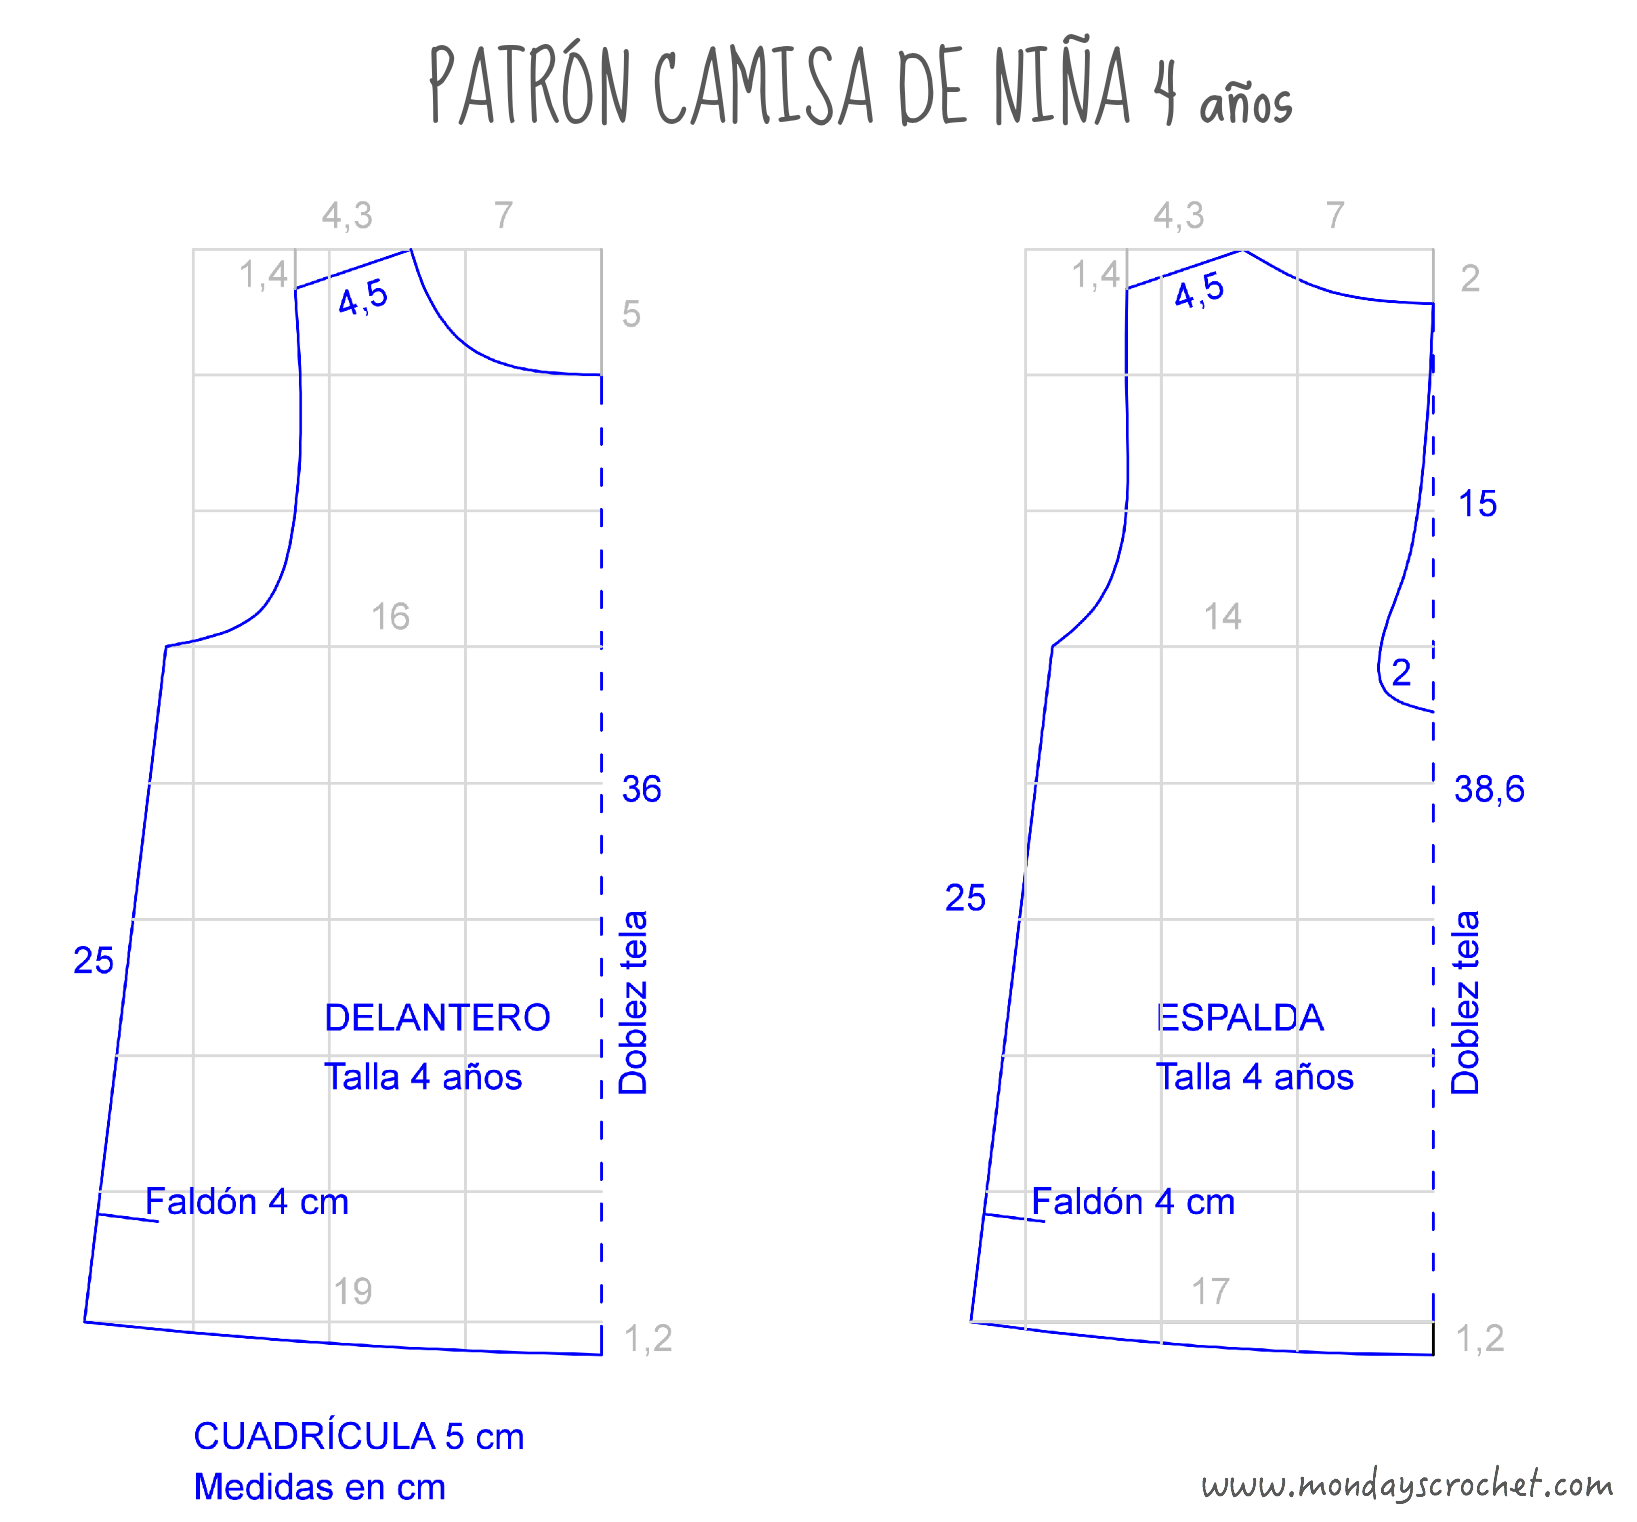
PATRONES DELANTERO Y ESPALDA / FRONT AND BACK PATTERNS
Con las medidas de la niña y nuestro diseño hemos dibujado los patrones delantero y espalda de la camisa.
With the measurements of the girl we have drawn patterns of the front and the back of the shirt.
TUTORIAL CONFECCIÓN DE LA CAMISA / DRESSMAKING TUTORIAL
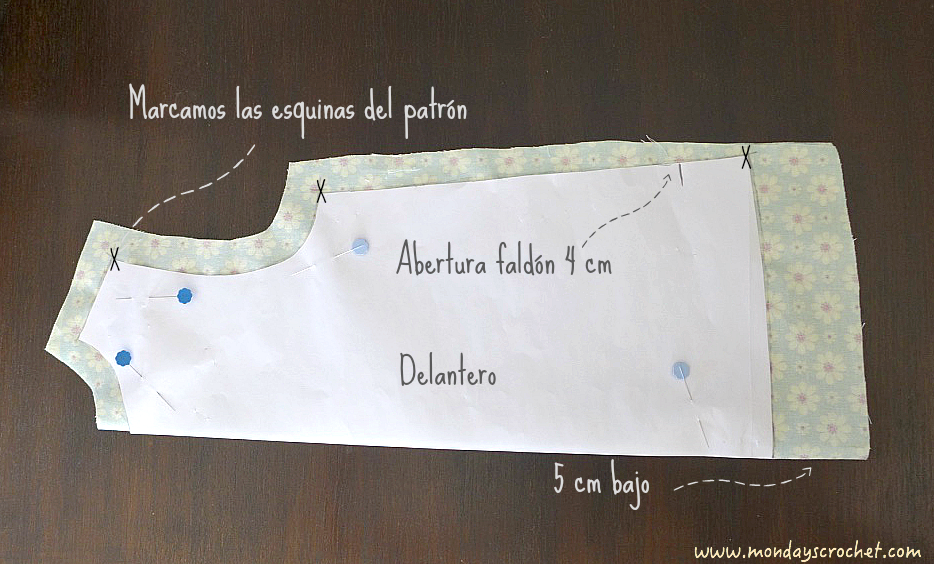
1. Marcamos los bordes del patrón delantero sobre la tela doblada por la mitad y por el revés. Marcamos la abertura lateral del faldón de 4 cm.
1. Mark the edges of the front pattern with the fabric folded in half and inside out. Mark the side opening of 4 cm.
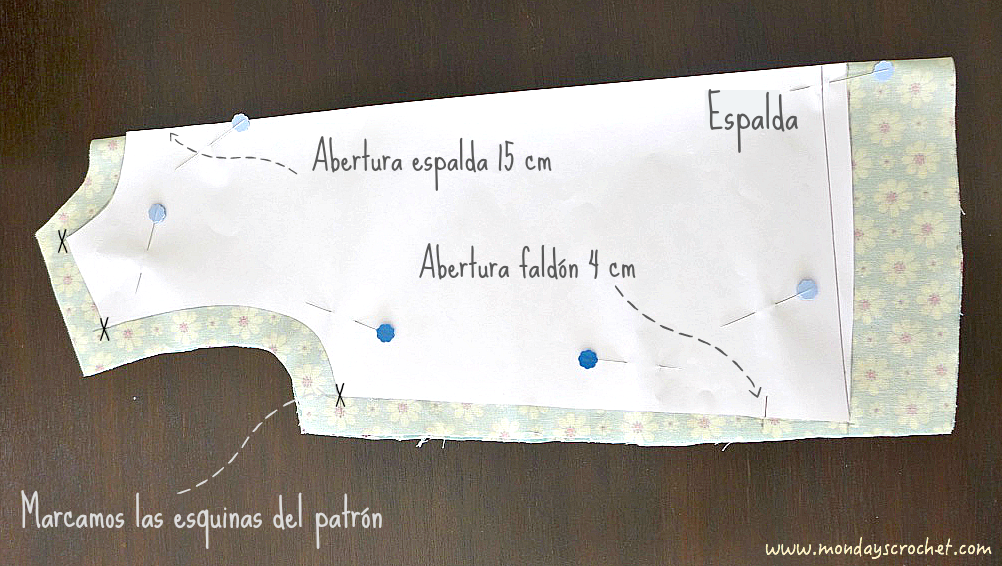
2. Marcamos los bordes del patrón de la espalda sobre la tela doblada por la mitad y por el revés. Marcamos la abertura lateral del faldón de 4 cm y la longitud de la abertura de la espalda de 15 cm.
2. Mark the edges of the back pattern with the fabric folded in half and inside out. Mark the opening of 4 cm and the length of 15 cm back opening.
3. Levantamos los patrones y con las marcas de las esquinas como referencia marcamos la otra cara de la tela.
3. Pick up the patterns and mark the corners as reference, mark the other side of the fabric also.
4. Encaramos los lados derechos de ambos patrones y hacemos un pespunte en los hombros, el lateral izquierdo hasta la abertura del faldón de 4 cm y unos centímetros en el lateral derecho hasta que coloquemos la cremallera.
4. Place the patterns together inside out and make a stitching at the shoulders, the left side up to the opening of 4 cm and a few centimetres on the right side where we will put the zipper.
5. Abrimos las costuras, las planchamos, si es necesario y cosemos unas puntadas en zig-zag para rematar estas costuras.
5. Open the seams, iron them if it is necessary and sew zigzag stitches to finish them.
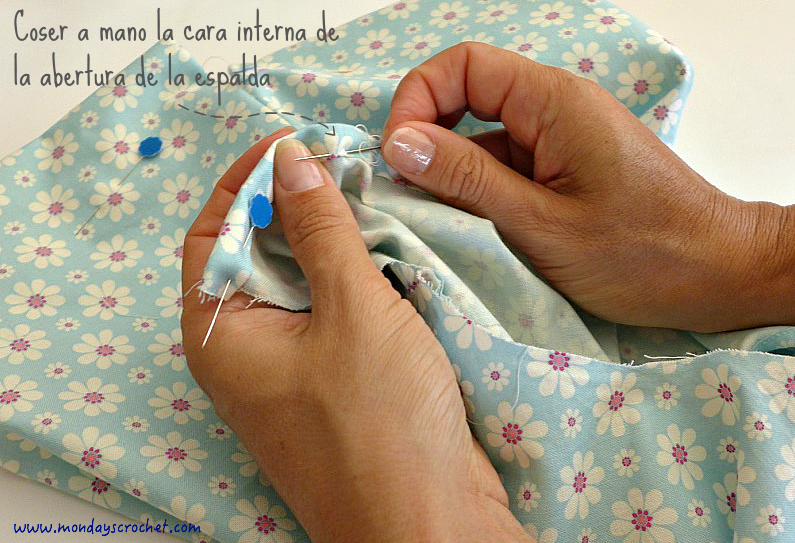
6. Cortamos la abertura de la espalda en forma de gota de agua de 15 cm de longitud y 4 cm de anchura máxima en la parte inferior. Cortamos una tira de tela de 36 cm de longitud y 3 cm de anchura. Encaramos los lados derechos y cosemos la cara del derecho de la prenda con un pespunte en la máquina y la cara interior a mano.
6. Cut the opening in the back (shaped as a drop of water) of 15 cm in length and 4 cm (Max) in width at the bottom. Cut a strip of fabric 36 cm in length and 3 cm in width. Turn the garment to face out and sew the facing (or outside) side using the machine and the inside by hand.
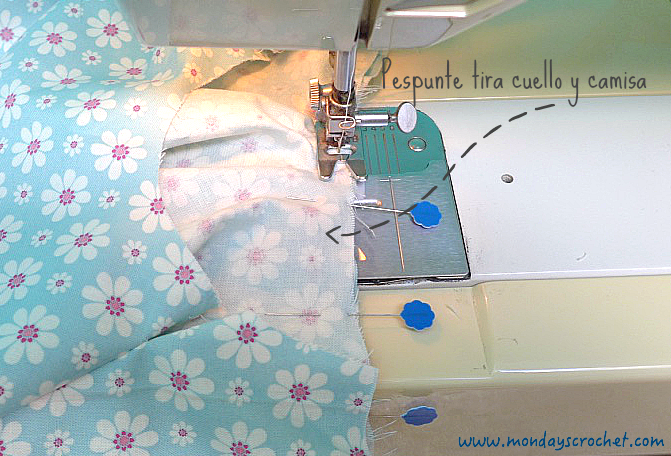
7. Para formar el cuello cortamos una tira de tela de 37 cm de longitud y 3 cm de ancho. Encaramos los lados derechos y hacemos un pespunte en la máquina por el lado exterior de la prenda.
7. To form the neck cut a strip of fabric 37 cm long and 3 cm wide. Make a stitch using the machine on the front of the shirt.
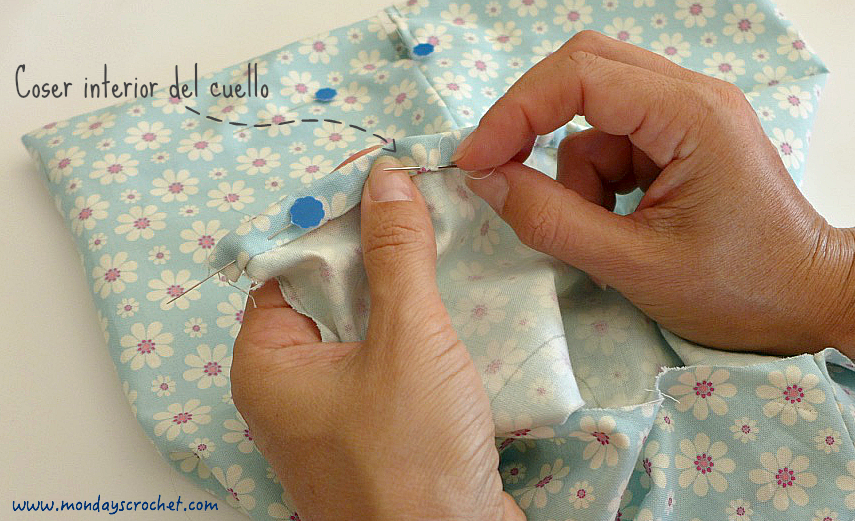
8. Cosemos a mano la parte interior de la tira del cuello de la camisa.
8. Hand sew the inside of the neck of the shirt Strip of the neck.
9. Hacemos un dobladillo de 7 mm en las mangas abriendo bien las costuras del hombro y los lados de la camisa y cosemos un pespunte en la máquina alrededor de las dos mangas.
9. Make a 7 mm hem on the sleeves by opening wide the shoulder seams and sides of the shirt and sew around the two sleeves using the machine.
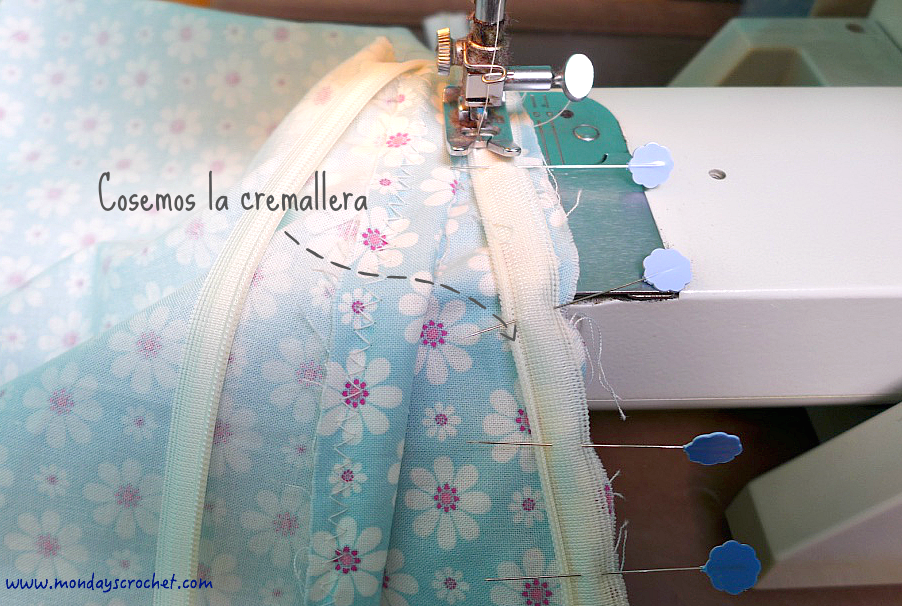
10. Colocamos la cremallera invisible de 20 cm y cosemos un pespunte en la máquina.
10. Place the 20 cm zipper and sew using the machine.
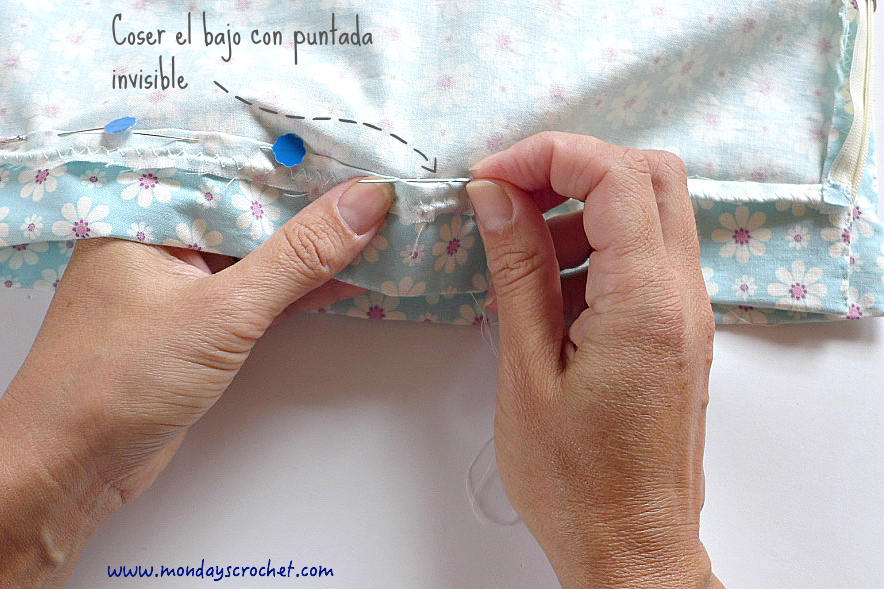
11. Prendemos con alfileres un bajo de 5 cm y cosemos a mano con puntada invisible.
11. Create a hem of 5 cm using pins and sew by hand with hidden seam.
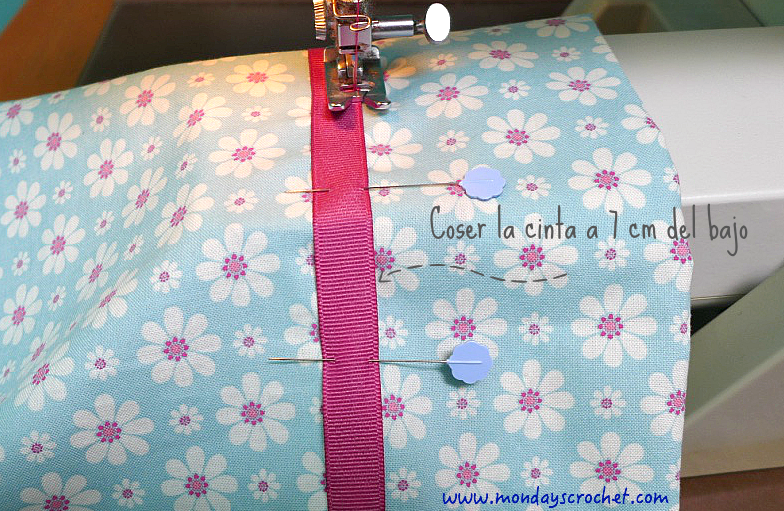
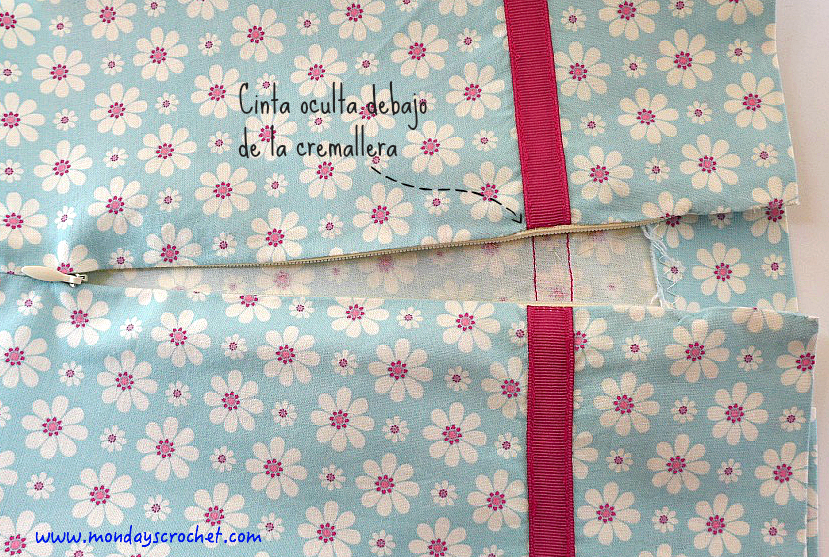
12. Prendemos con alfileres por el derecho y cosemos en la máquina una cinta gros-grain de 13 mm de ancho a 7 cm del bajo de la camisa.
12. Place a gross-grain ribbon of 13 mm width 7 cm from the bottom of the shirt (fasten using pins) and sew using the machine.
13. Levantamos la cremallera donde coincide con la cinta para ocultarla.
13. Raise the zipper where it coincides with the tape to hide it.
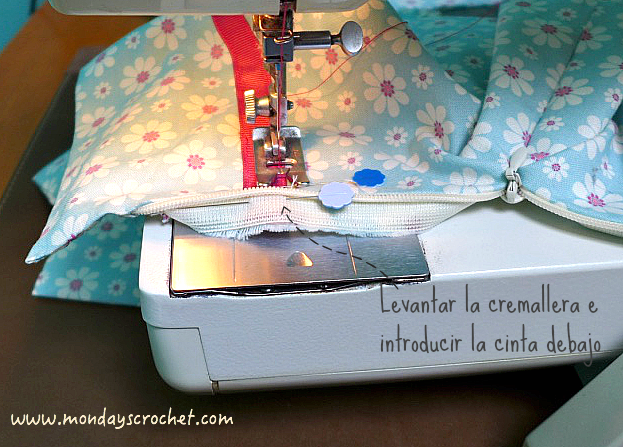
14. Volvemos a coser estos dos tramos de la cremallera.
14. Sew again these two sections of the zipper.
15. Hacemos un lazo con cinta para cerrar en la espalda la camisa. Le damos unas puntadas invisibles a mano para fijarlo a la camisa y cosemos un automático pequeño.
15. Make a loop with the ribbon to close the back of the shirt and sew a small stud by hand with a hidden seam.

Hemos terminado la parte de costura.
The sewing part is now complete.
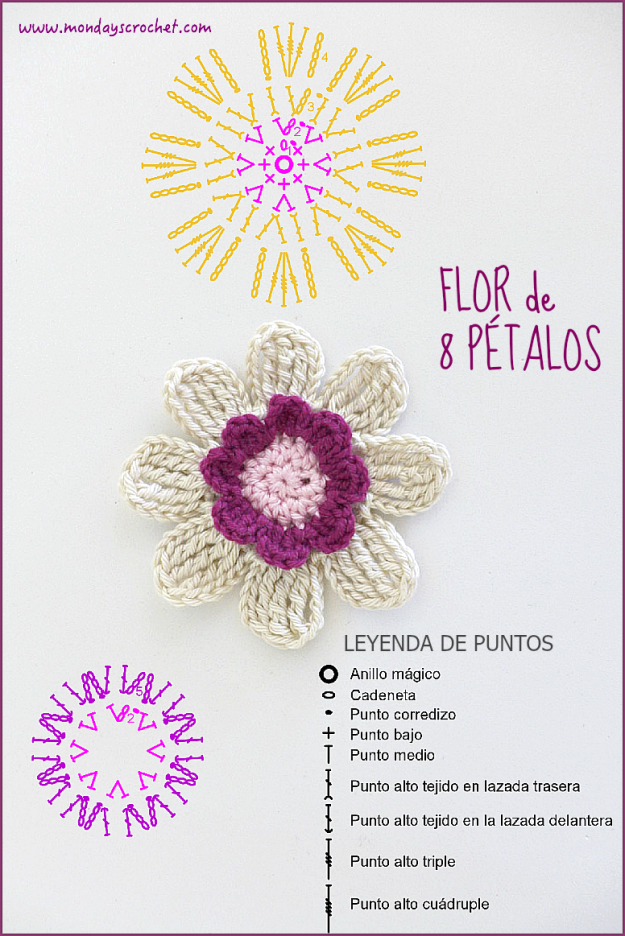
TUTORIAL FLOR DE CROCHET / CROCHET FLOWER TUTORIAL
Vamos a tejer una flor que adorne la cinta de la camisa.
GRADO DE DIFICULTAD
Medio
MATERIALES PARA LA FLOR DE CROCHET
Hilo de algodón de color rosa, beige y fresón.
Aguja número 3.
PUNTOS DE CROCHET UTILIZADOS
- Anillo mágico
- Cadeneta (c.a.d.)
- Punto corredizo (p.c.)
- Punto bajo (p.b.)
- Punto medio (p.m.)
- Punto alto tejido en la lazada delantera
- Punto alto tejido en la lazada trasera
- Punto alto triple (p.a.tr.)
- Punto alto cuádruple (p.a.cuad.)
En color rosa.
VUELTA INICIAL: Anillo mágico
VUELTA 1: 1 c.a.d. de subida y 7 p.b. en el anillo mágico. Cerrar con 1 p.c.
VUELTA 2: 2 c.a.d. de subida y 1 p.m. en el mismo punto. 2 p.m. juntos en cada p.b. de la vuelta anterior. Cerrar con 1 p.c.
Cambio a color beige.
VUELTA 3: Tejer toda la vuelta en la lazada trasera de los puntos medios de la vuelta anterior. 3 c.a.d. de subida y 1 p.a. en el mismo punto. En el siguiente p.m. tejer 1 p.a., 2 p.a. juntos, 1 p.a. Repetir hasta completar todos los puntos y cerrar con 1 p.c.
VUELTA 4: 5 c.a.d. de subida. En el siguiente punto tejer 1 p.a.tr. 1 p.a. cuád. 1 p.a.tr. en el mismo punto. 5 c.a.d. de bajada y cerrar con 1 p.c. en el siguiente punto. Este es nuestro primer pétalo. Tejer 1 p.c. para pasar al siguiente punto, 5 c.a.d de subida, 1 p.a.tr. 1 p.a. cuádruple 1 p.a.tr. en el mismo punto. 5 c.a.d. de bajada y cerrar con 1 p.c. en el siguiente punto. Repetir hasta completar 8 pétalos.
Cambio a color fresón.
VUELTA 5: Tejer toda la vuelta en la lazada delantera de los puntos medios de la vuelta 2. Tejer 3 c.a.d. de subida y 1 p.a. en el mismo punto. En el siguiente p.m. tejer 1 p.a., 3 c.a.d. de bajada y 1 p.c. Pasar con 1 p.c. al punto siguiente. Repetir hasta completar 8 pétalos.
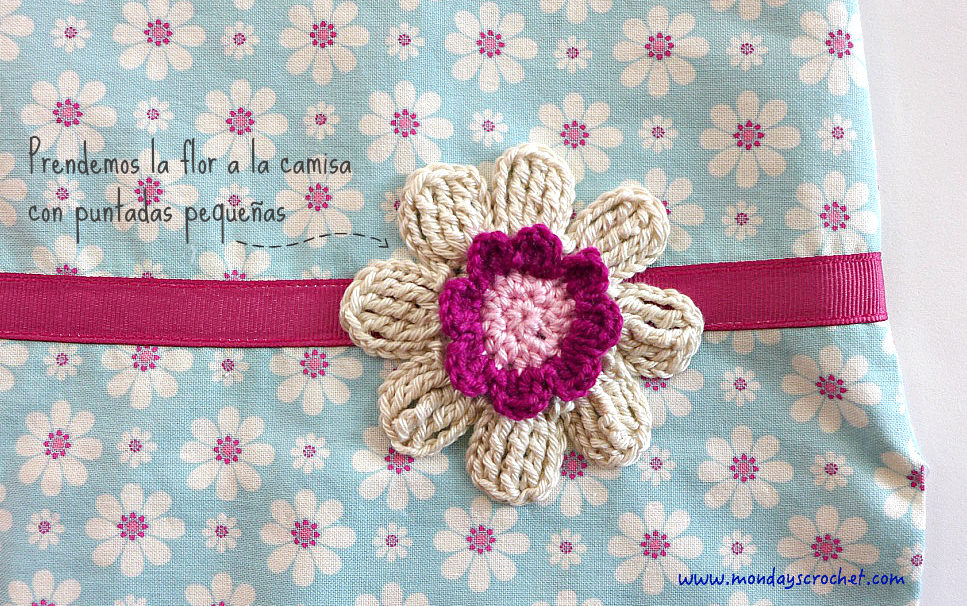
Rematamos con una aguja todos los hilos sobrantes y prendemos la flor a la camisa con hilo del color del vestido y puntadas muy pequeñas.
DIFFICULTY
Medium
CROCHET FLOWER MATERIALS
Pink, beige y fuchsia cotton
Hook nº 3
STITCHES
- Magic ring
- Chain (ch)
- Slip stitch (sl st)
- Single crochet (sc)
- Half double crochet (hdc)
- Front post dc (FPdc)
- Back post dc (BPdc)
- Treble crochet (tr)
- Double treble (dtr)
In pink:
STARTING ROW: Magic ring
ROW 1: 1 ch to start the row and 7 sc in the magic ring. Close with 1sl st.
ROW 2: 2 ch to start the row and 1 hdc in the same stitch. 2 hdc together in each sc of the previous row. Close with 1 sl st.
Change the color to beige.
ROW 3: Work the row in the back loop of the hdc of the previous row. 3 ch to start the row and 1 dc in the same stitch. In the next hdc make 1 dc, 2 dc together, 1 dc. Repeat to compleat all the stitches and finish with a sl st.
ROW 4: 5 ch to start the row. In the next stitch make 1 tr, 1 dtr, 1 tr in the same stitch. Go 5 ch back down and finish with a sl st in the next stitch. This is the first petal. Make 1 sl st to go to next stitch, 5 ch to start the row, 1t, 1 p.a. 1dtr, 1 tr in the same stitch. Go 5 ch back down and finish with 1 sl st in the next stitch. Repeat to complete 8 petals.
Change the color to fucshia.
ROW 5: Work all the row in the front loop of the hdc of the row 2. Make 3 ch to start the row and 1 dc in the same stitch. In the next hdc make 1 dc, go 3 ch back down and 1 sl st. Go to next stitch with a sl st. Repeat to complete 8 petals.
Finish off by fastening it to the shirt with small stitches and with the same color of the shirt thread.
La camisa está terminada!!
The shirt is finished!!!

Qué bonita es! Qué manos tenéis, qué arte! Qué gusto da ver vuestras creaciones.
Me gustaMe gusta
Gracias Oscar! Cómo te sigas portando así de bien con nosotras te haremos un gorro. Envía medidas!!
Me gustaLe gusta a 1 persona
Ja ja! Gracias! No me lo digais dos veces! Que luego iré por ahí vacilando de gorro! 😉
Me gustaMe gusta
Que bonita!!! Es estilo 100% mondayscrochet. Hecho con amor. Un besazo
Me gustaMe gusta
Con mucho amor!! Agradecemos mucho a su papá y mamá que nos permitieran publicar su foto.
Gracias Alicia! Besos.
Me gustaMe gusta